Important: This article refers to the Styku S100 model scanner. To determine which model scanner you own please view the following article: https://www.styku.com/help/search/which-styku-scanner-do-i-have
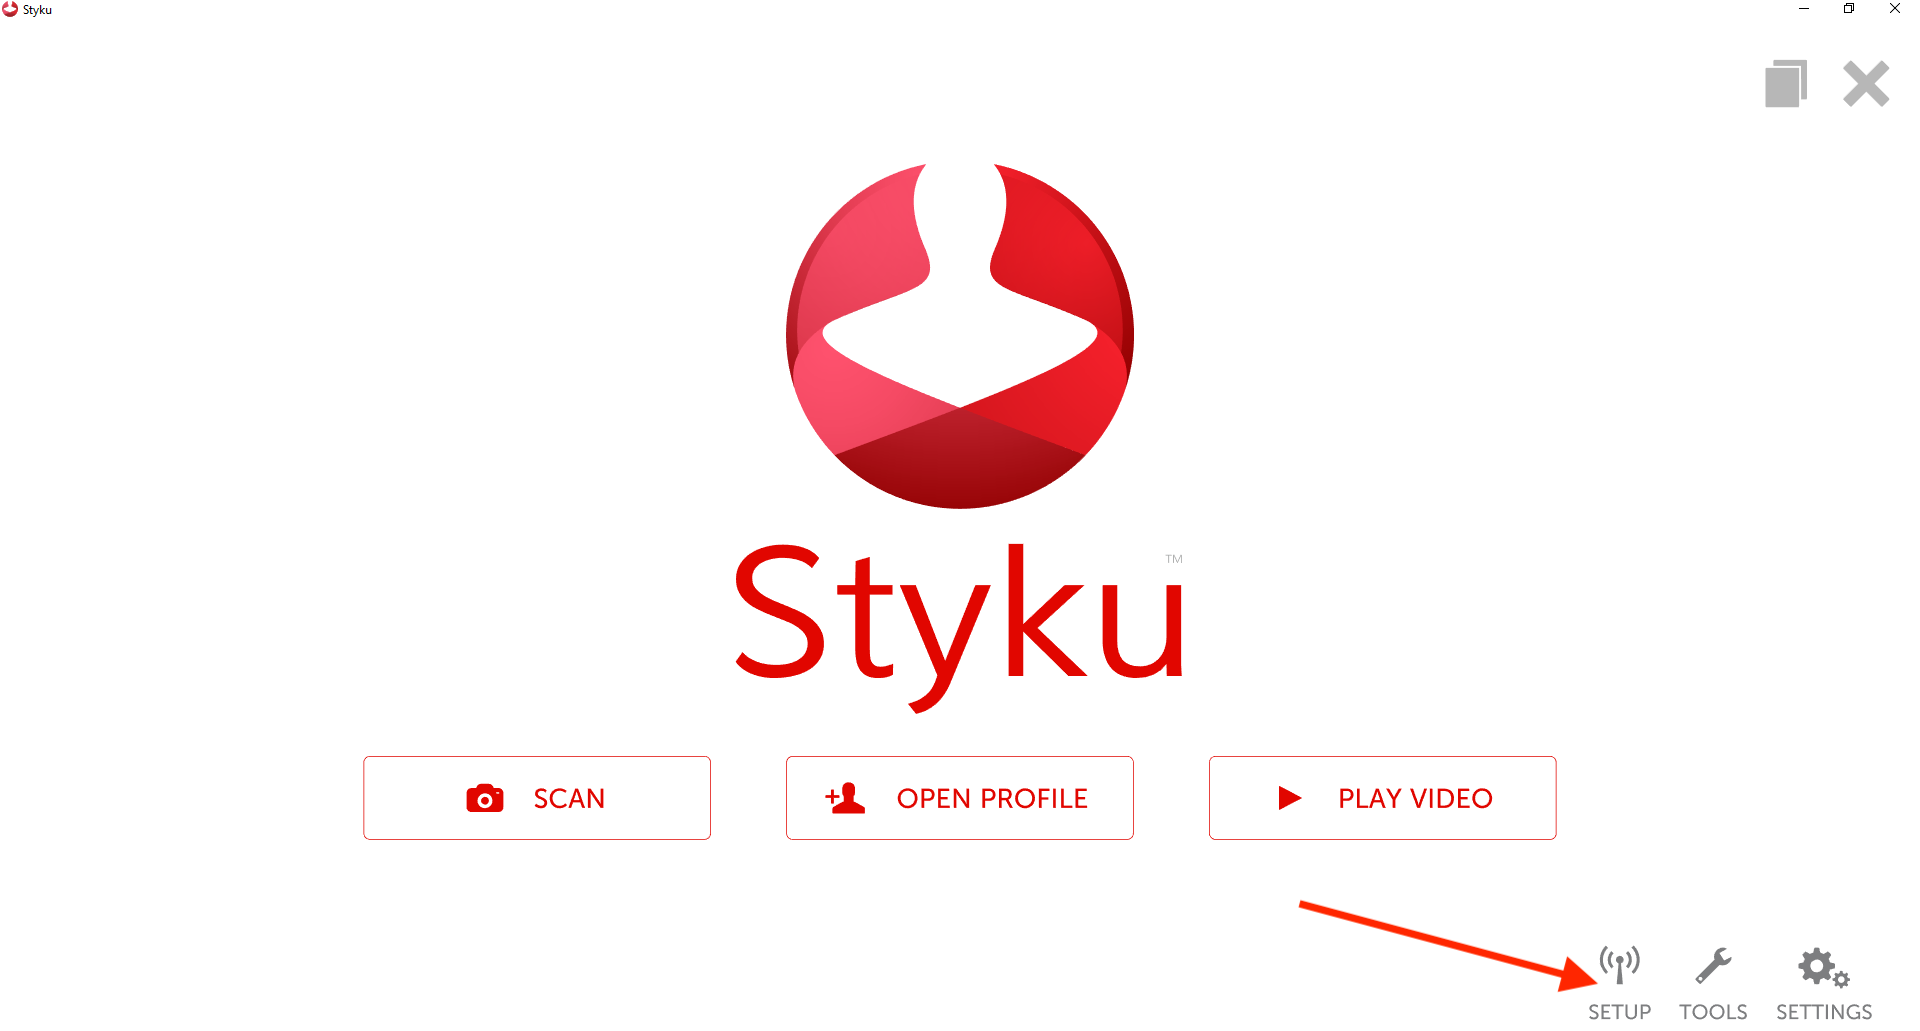
Step 1 : Press the Setup button to start the setup process.
Step 2 : The Styku software will go through all of the hardware connections.
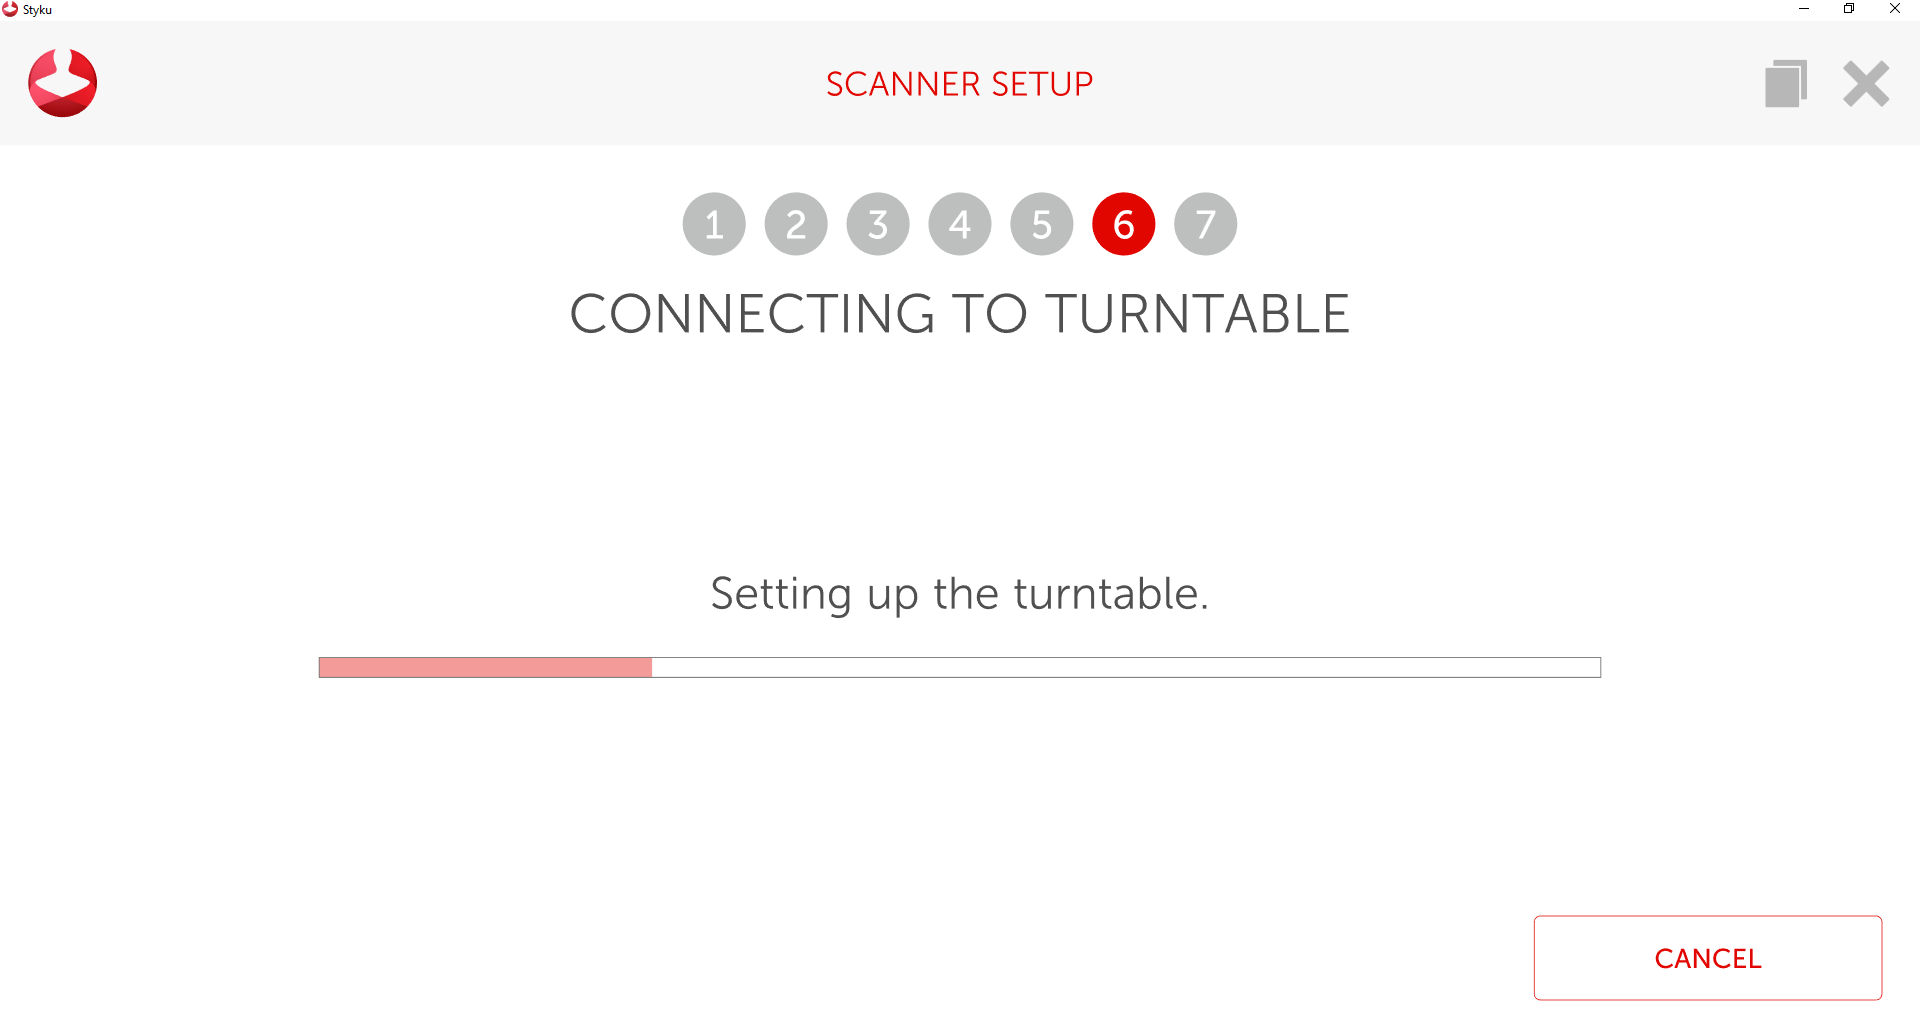
Step 3 : If there is an issue with a connection, the setup process will ask you to troubleshoot and wait until it detects a connection. Follow the instructions to re-connect the part.
%20(1).png)
Step 4 : Once the software detects all connections, it will complete setup. You can now close the setup window and begin scanning.
.png)