- Styku Knowledge Base
- Configuring Settings and Features
- Reports and Sharing
Can I customize which pages are included in the Styku scan and progress reports?
You can set which pages to include in the scan and progress reports. Read on below to learn how.
Step 1 : Press the Settings button to open the Settings menu.
Step 2 : Choose the Reports and Sharing option.
%20(2).png)
Step 3 : Press the Advanced tab button.
%20(1).png)
Step 4 : Log into your administrator account.
.png)
Step 5 : To customize which scan report pages are sent by default, choose the Scan Report Pages option. To customize which progress report pages are sent by default, choose the Progress Report Pages option.
%20(2).png)
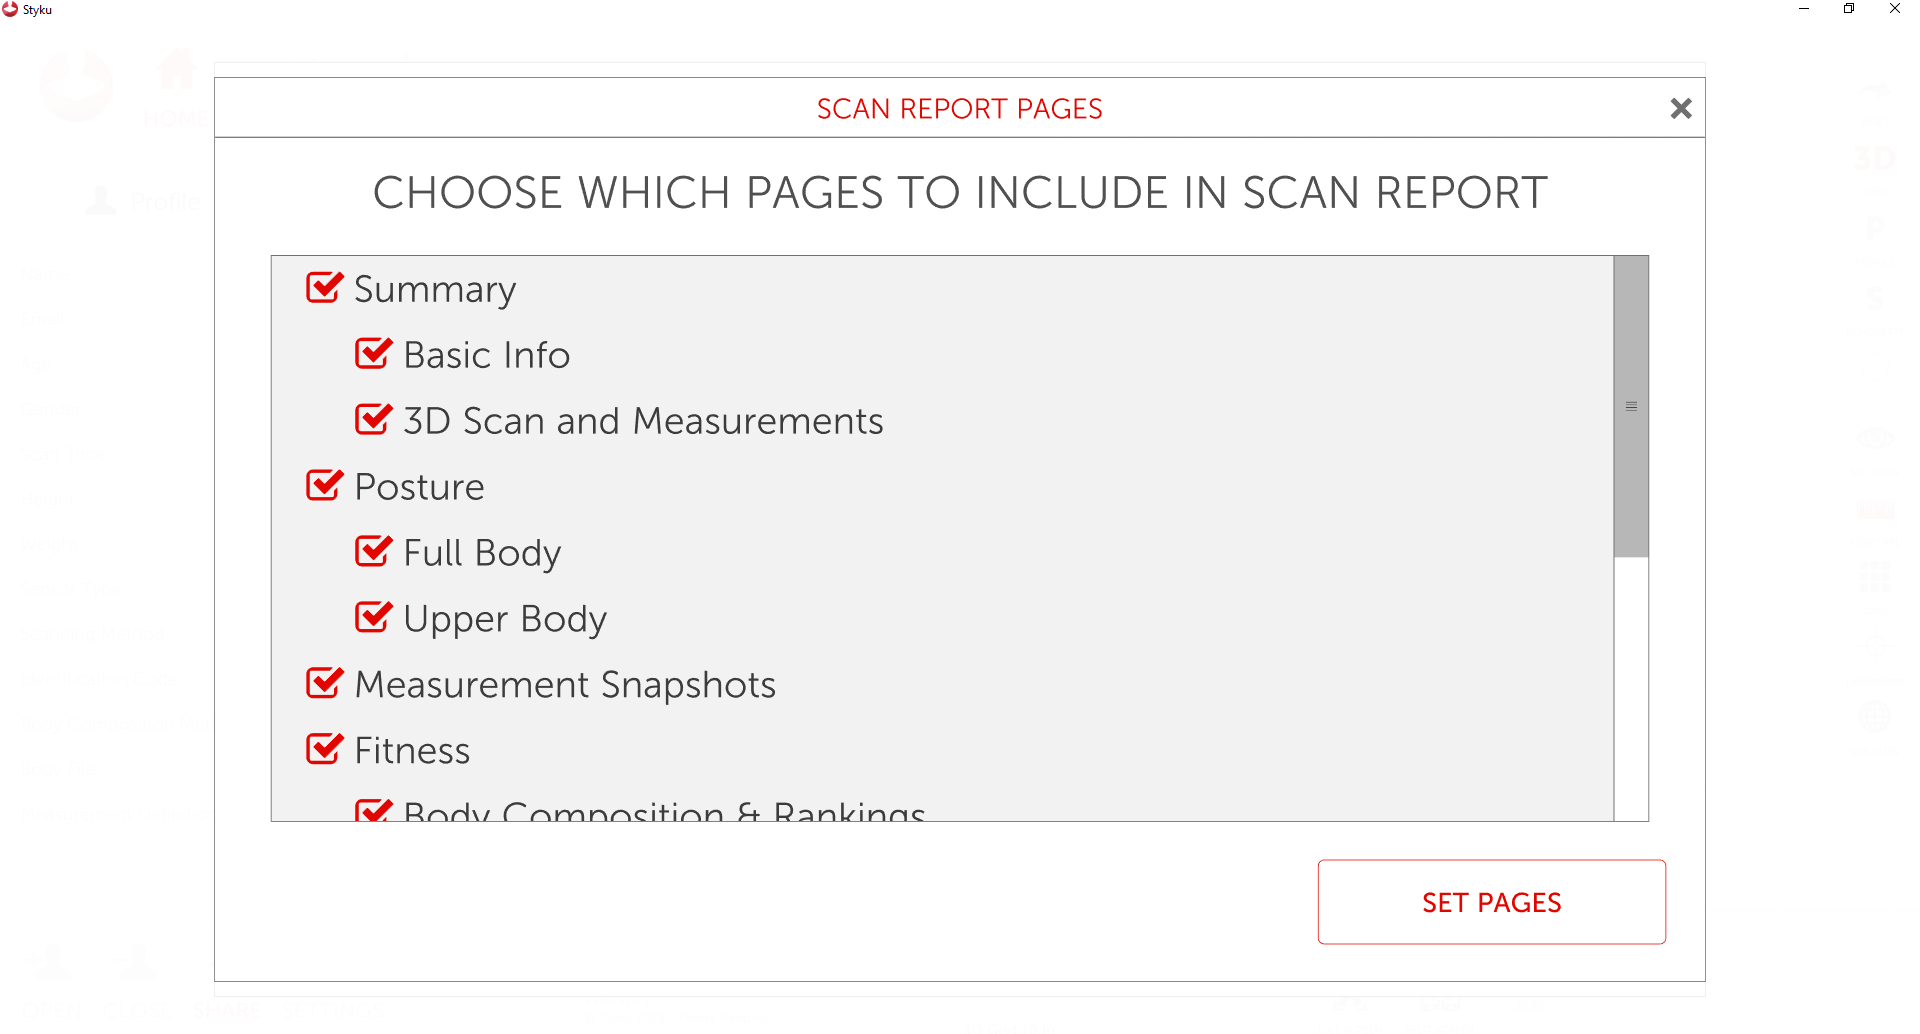
Step 5 : Choose which pages you want to include by check-marking them. Any pages without a check mark will not be included in the report by default. Press Set Pages when finished.